
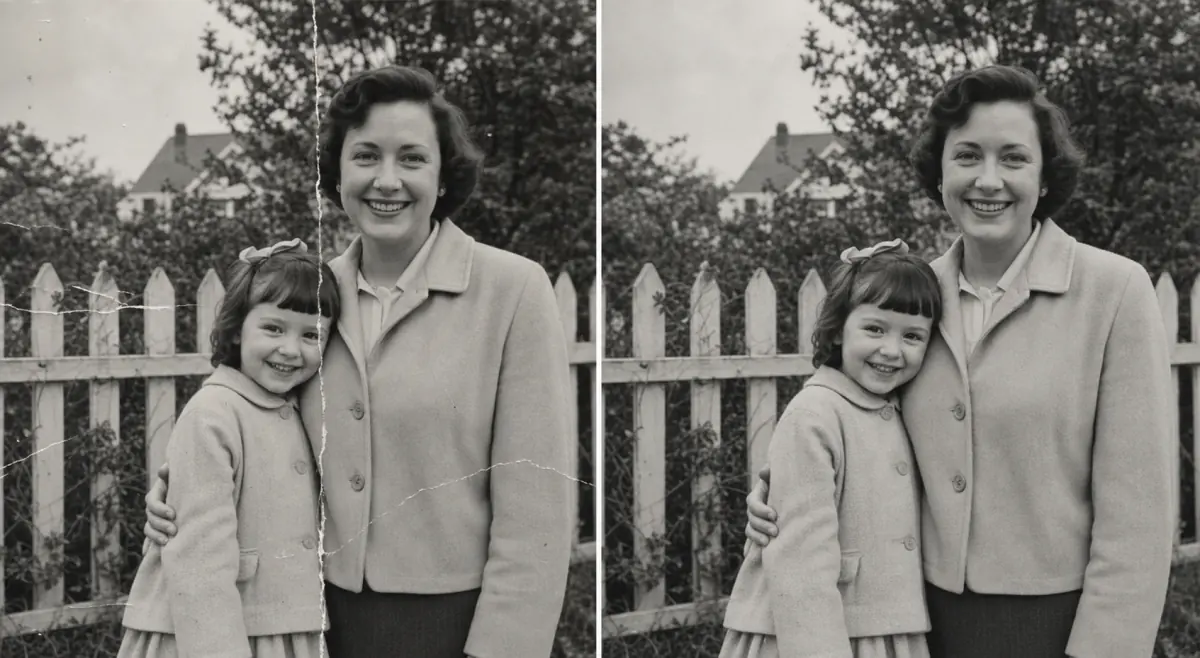
A scratch, crease, or torn edge removes image information from a physical print. Digital repair can make the scanned copy look continuous again, but it does so by generating a plausible local fill. The goal is to preserve the photograph's people, tone, grain, and period character—not to modernize every face or invent detail that cannot be verified.
Start with the best scan you can make
- Clean the scanner glass. Dust on the glass creates new marks that look like damage in the digital file.
- Scan at a useful resolution. A detailed master gives the repair more real grain and edge information to work with.
- Keep color information. Even a black-and-white print can contain useful tonal variation; avoid crushing it into pure black and white.
- Save an untouched master. Export a working copy and preserve the original scan separately.
If you only have a phone, photograph the print square-on in even light, avoid glare, and fill the frame without cutting off the edges. Do not run multiple automatic enhancement filters before repair: oversharpening and denoising can erase the texture that helps the model continue a damaged area naturally.
Repair scratches and creases step by step
- Begin with a simple defect. Choose a short scratch over sky, clothing, wall, or another consistent surface.
- Use a narrow brush. Cover the full damaged line plus only the smallest useful margin.
- Stop where the surface changes. Split a crease where it moves from background to clothing or from clothing to a face.
- Generate one repair. Compare it before marking the next defect.
- Restart from the master when needed. Do not keep painting over a softened generated patch.
Protect faces, handwriting, and unique details
Identity-sensitive areas need a stricter standard. A repair crossing an eye, mouth, distinctive scar, medal, signature, or handwritten date should not be accepted merely because it looks smooth. Keep the mask as narrow as possible and compare facial shape, expression, gaze, and surrounding edges against the untouched scan.
When important information is completely missing, look for another print, negative, contact sheet, or family copy. A reference image can support professional restoration; a single damaged scan cannot prove the exact content hidden under a tear.
The old-photo repair quality checklist
- Faces keep the same proportions, expression, and identifiable details.
- Fence rails, clothing seams, horizons, and building edges continue cleanly.
- Film grain remains consistent instead of turning into a soft rectangular patch.
- Grayscale tone and contrast match both sides of the former defect.
- No scratch fragment, white halo, duplicate texture, or invented object remains.
- The untouched master scan is still preserved separately.
Repair is not the same as full photo restoration
This workflow addresses selected damage. Global deblurring, face enhancement, exposure correction, colorization, and print reconstruction are separate operations with separate risks. Combining every change in one automated pass makes it harder to see what altered identity or historical detail.
Repair the physical defects first, export a reviewed copy, and only then consider other enhancements. Label edited archival images honestly when context requires it. For the underlying technique, read what AI inpainting is and how it works.
Frequently asked questions
Can AI repair scratches in old photos?
It can generate a plausible continuation through selected scratches when useful tone and texture remain nearby. It cannot recover exact lost historical pixels.
Should I scan the original photo first?
Yes. Use the highest practical resolution, clean the scanner glass, disable aggressive automatic enhancement, and keep an untouched master scan.
Can I repair all scratches in one mask?
Small connected defects can be grouped, but separate scratches and tears are safer as separate edits, especially when they cross faces or different materials.
Does photo repair also colorize the image?
Not on this page. Local damage repair and full-image colorization are different tasks and should be reviewed separately.